Showing posts with label SWAP. Show all posts

Monday, May 28, 2018

Get Down with your Bad Self

Oh my gosh, you guys!  I had so much fun with this next make.  I have had this pattern in my stash for ever and ever, literally - I think I picked it up when it first came out.  But for some reason I kept putting it off because I thought it was hard. I used to sew wedding gowns and alter prom dresses.  Why on earth would I think that making this pattern would be so hard??  I stalked the reviews at Patternreview.com and finally worked up my nerve to include it as part of my #makenine2018 just to get it off my #scarypatternlist.

Yes, this is the iconic Kwik Sew 3764 motorcycle jacket.

I chose an olive green stretch cotton twill that I've also had in my stash forever and ever.  I have no idea where I bought this from, or even how long I've had it.  I'm pretty sure it's embarrassingly old - like so old I think I moved it from my old house.  And that was almost 10 years ago.


The zippers are new, from my local Fabricland chain store.  The snaps are also new.


I made my usual swayback adjustment to the pattern and lengthened the sleeves by 1".


During the making process, I decided to narrow the shoulders by about 3/4".  They're still plenty wide, which is the style of the jacket.  You'll also note the gorgeous embroidered rose applique on the left sleeve near the hem.  I blame a friend of mine who showed up at our most recent sewing retreat this past winter for introducing me to these.  I bought mine from Amazon.ca here.


The sleeve vents weren't hard at all - the instructions were very easy to follow, and turned out pretty good, if I do say so myself.  I think the hardest part was inserting the snaps.  The directions on the packet said to try it on a scrap of fabric first.  Of course, I knew better and went gangbusters to the first snap on the epaulet.  And...if course, I dinged the part that holds the snap together with the hammer and it almost didn't close.  I used said hammer to bang the two pieces together.  At least it isn't going to be opened and closed regularly, so it's all okay.

The best part of the jacket is...


THE BACK!!!  I used the applique stitch on my machine to sew all of these roses on.  I'd be happier if I did this before the entire jacket was completed, but honestly, I didn't even think of adding the appliques until my friend showed up with hers.  (Thanks Kelli!! I think it really elevates the jacket!)

I didn't add any lining, though if I make this again, I think I will.  It just helps the jacket slip off and on easier.  The fit is also a bit roomier than I would like, but it certainly looks good, if I do say so myself.

The jacket turned out great, especially because I thought it was so scary before I started.  #sewinggoals I'll consider this a win for both #makenine2018 and my Spring in Prague SWAP!


Friday, March 23, 2018

Spring Travel Plans = Spring SWAP plans

Even though we've passed the spring equinox, our days aren't feeling very spring like.  The sun is shining brightly and longer, but it's still cold out.  Despite that, when the days get longer and sunnier, my thoughts turn towards spring.  And to me spring means a bright fun wardrobe.  I'm almost done the first phase of my current SWAP, with only two more items to go (a skirt and a jacket).  I've finished the pants but haven't blogged them yet.  BUT...I've also just booked plane tickets to go to Prague in June.  #soexcited

Travelling to me means SWAP or capsule wardrobe.  I travel with only a carry on bag, which means new SWAP is in order.

My first order of business when planning a SWAP or capsule wardrobe is always to browse - magazines, online, Pinterest, photographs, books.  In this case, I searched Pinterest for "Spring Wardrobe", "Spring Outfits" and "Prague Outfits".  When something catches my eye, I start my own board, specifically for that SWAP or season.  I keep pinning more and more outfits or photographs of anything that catches my eye.  When I have about twenty or thirty, I again take a closer look at what it is that catches my eye - in this case it was a combination of the colours coral and olive, and that the clothes were relaxed yet pretty and feminine.  Here's a perfect example of a colour palette I found on Pinterest:

Faded Floral. The chosen colors. Yay!!  Way better than your first idea kater.

The next step is to go digging through my stash.  My stash is expansive, so this always takes some time, but I always have so much fun stash-diving.  This time, I combined this with a bit of a sewing space clean out and donated/tossed some fabrics I know I won't be using (ever!).  I do the same thing with my fabrics as I did with Pinterest, just pull things that catch my eye, that fit the colour palette and fit the feeling of the collection that I'm going for.  I don't organize specific fabrics to specific patterns until later.  I found some good stuff:

 
The next thing I do to plan my travel wardrobe is to write the list of events I'll be attending, activities I'll be doing, as well as do a bit of research on the anticipated weather for the time of year I'll be travelling.  Am I travelling for work?  Am I travelling for pleasure?  Do I need certain clothes to do certain activities (swimming, hiking, biking, city walking, attending meetings or parties, etc.)?  I write an outline of the clothes I think I'll need - this is based off my travel  experience, my sewing experience with SWAP and a lot of research.  I have a standard formula of clothing items that seems to work really well (highlighted in bold below).  This formula can be suited towards any type of vacation, simply change the style of clothing required.  For example, the jacket can be either a suit jacket or blazer, or an athletic waterproof fabric, or a relaxed and cozy cardigan.

On this trip, I'll be doing mostly European city touristy/vacation type things - museums, in-town walking tours, art galleries, but I also like to dress for dinner, and there is the possibility of an evening reception or two.  So, I'm going for a business casual wardrobe with a dress or separates that can be dressed up a bit.

Here's what I'm thinking:

1.  Jacket, olive green cotton motorcycle style jacket, Kwik Sew 3764 (one of my Make Nine!)
Image result for kwik sew moto jacket
2.  Pants #1 - Tan textured cotton Lander Pants, view C (another #makenine2018)
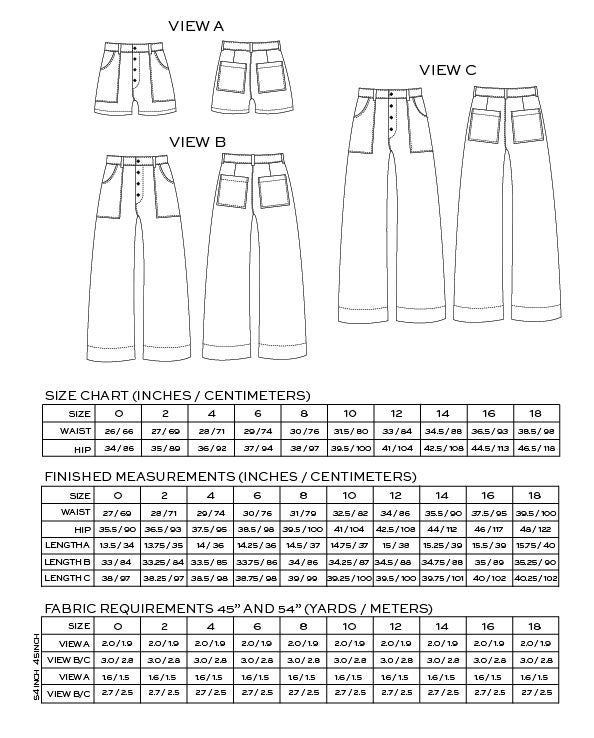
Image of LANDER PANT & SHORT (PDF)
3.  Pants #2 - Vogue 8330 slim cut jeans in blush stretch "denim"


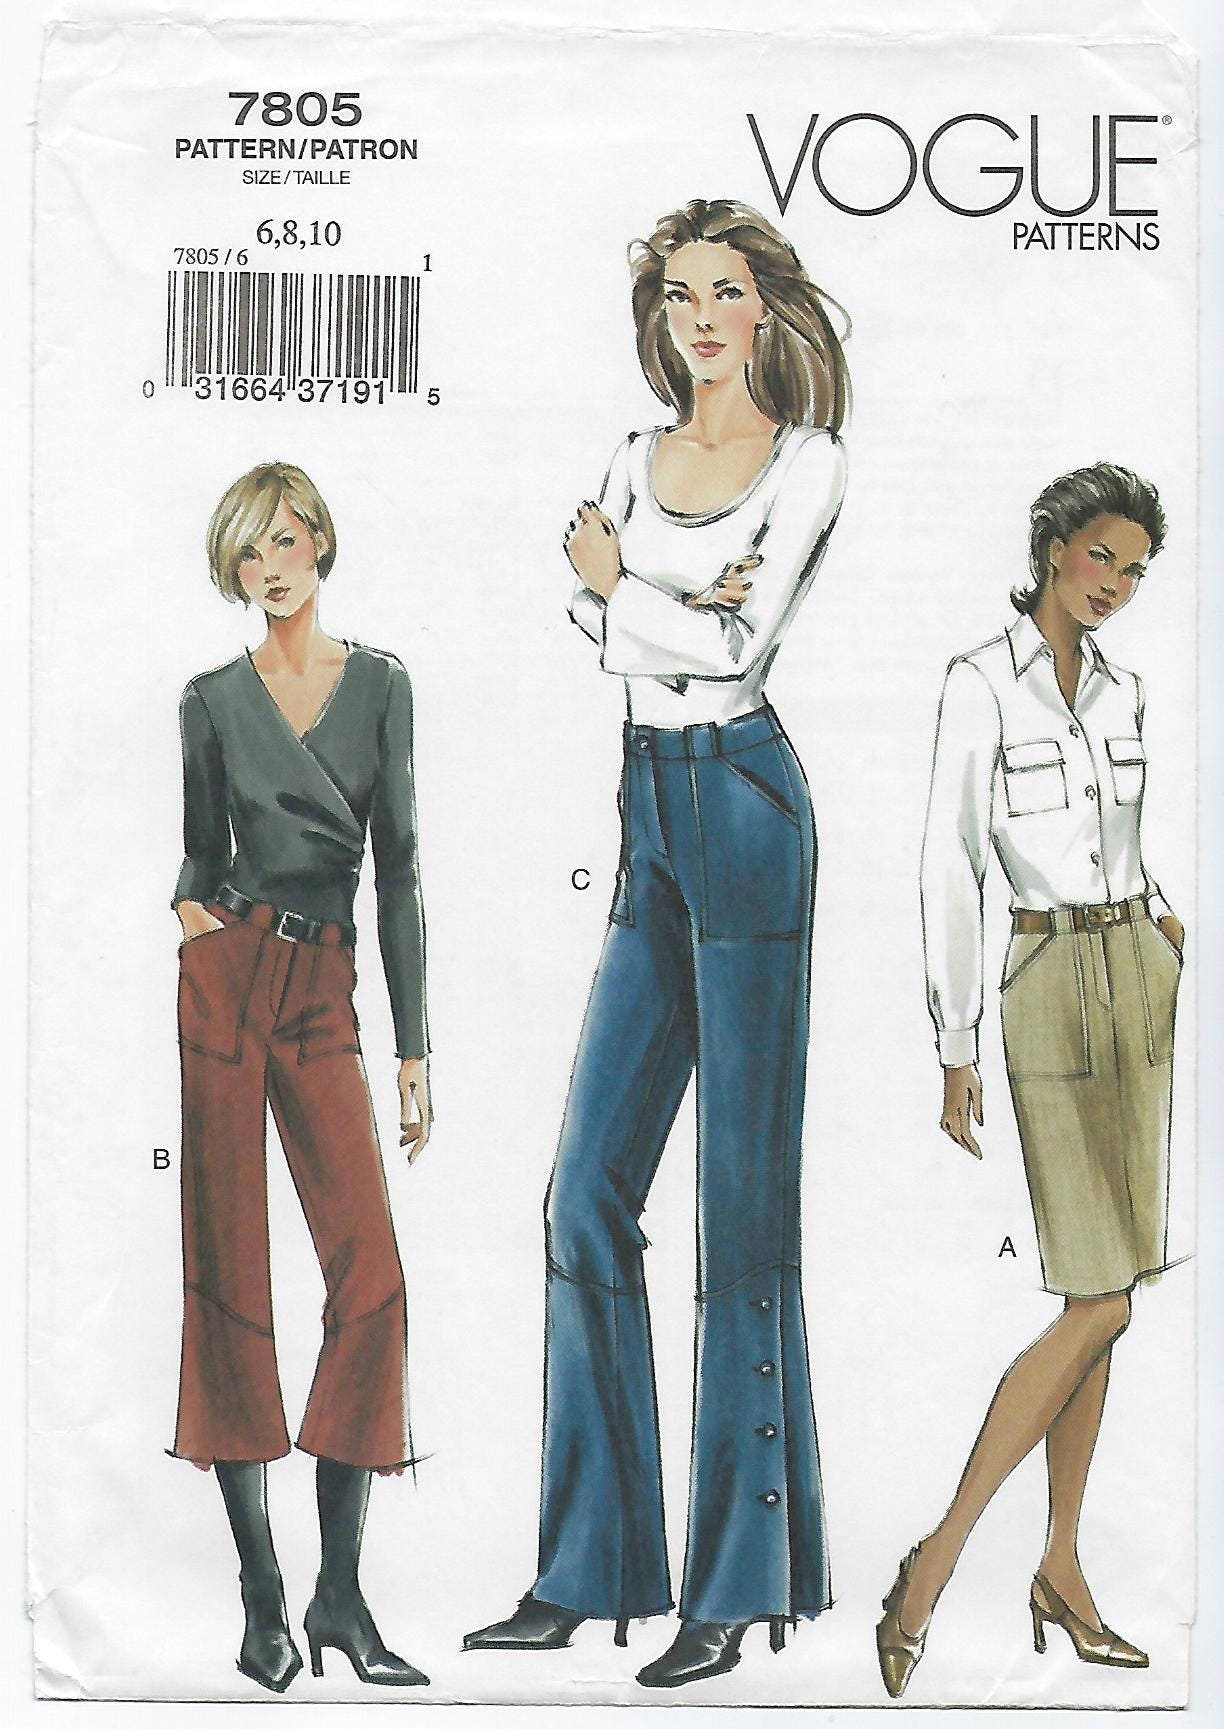
4.  Skirt #1 in a solid colour - Vogue 7805 in olive cotton
Image result for Vogue 7805

5.  Skirt #2 in a print or check - I'm switching this out to a pair of cropped wide-legged trousers in an olive medium weight linen/cotton blend - I'm thinking if the Lander Pants above is a success, why not use the same pattern but the cropped length (view B) for these?

6.  Top #1 - blush pink rayon jersey drapey tee, Sandra Betzina Vogue 1291 OOP
Image result for sandra betzina top pattern vogue

7.  Top #2 - coral pink cotton/lycra jersey drapey tee with 3/4 length sleeves, M7249

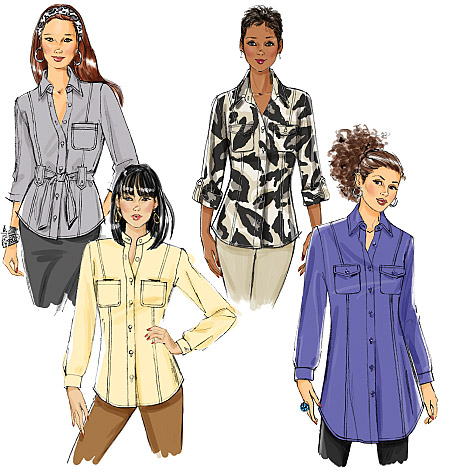
8.  Top #3 - creamy white cotton/linen shirt, Butterick 5678
 & 9.  Top #4 - tropical print cotton shirt, Butterick 5678, sleeveless

Image result for butterick 5678

10.  Top #5 - ITY print in brown and cream, sleeveless tee/tank

Image result for new look pattern drapey top

11.  Top #6 - flow-y sleeve loose tee, olive jersey, New Look 6913

Image result for new look pattern drapey top

I'm also throwing in an easy jersey dress which can be dressed up or down, and a pair of leggings and a lightweight hoodie in brown knit technical fabric.  I'll need the dress for dinner out one or two nights, and the leggings and hoodie will be my pjs and yoga gear.   For the dress I've chosen the infinity dress pattern from Butterick, in an olive green jersey, which will give me lots of different looks.
Image result for butterick infinity dress
I have also found a cozy cardigan and a lightweight rain jacket to layer over everything are necessary items.  I have a really unique wool sweater knit fabric in an olive-y/tan/brown colour for a Blackwood cardigan.  I haven't figured out what fabric or pattern for the rain jacket yet.

Blackwood Cardigan

Accessories will include scarves, a few cheap but gorgeous statement necklaces, hoop earrings in gold, and two pairs of supportive shoes (one casual pair and one dressier yet just as comfortable pair, perhaps sandals of some kind).

As you can see, this SWAP has absolutely nothing to do with my previous SWAP - the colours I've chosen aren't immediately noticeably cohesive with the previous capsule wardrobe I've sewn, but I think there will be the ability to mix and match some of them together.  Regardless, I am blessed with a large closet, a large stash of fabric, and loads of patterns.  And I'm sewing (and eventually wearing) what will make me happy.

Monday, March 12, 2018

Disoriented SWAP'ping (FO - Vogue 7827)

So, sometimes my SWAP plans get a bit disoriented.  In this case, I had a party that I was going to and I wanted a new top to wear, as one does.  And while I'm really trying to be disciplined and stick to my SWAP plans, I'm down to the last two items in my main SWAP, which are a glen plaid jacket and a matching glen plaid skirt.  I've been holding off on the glen plaid, because, well...plaid.  Matching isn't my favourite thing.  Anyhoo...back to the party.  I had pulled this fabric and pattern for the next phase of my SWAP and thought Vogue 7827 would make the perfect party top.


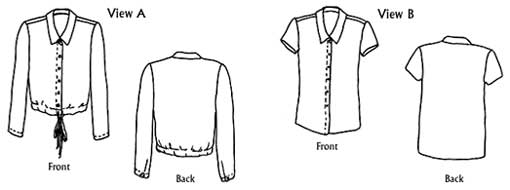
I chose View B, and used a black chiffon with tiny white polka dots.  I cut my usual size 16.


There are only three pattern pieces for this top - a front, a back and a guide for the elastic.  It seems relatively straight forward - the front and back are basically rectangles.


BUT...said rectangles are cut on the bias.  With narrow hems.  ALL AROUND.  And this is chiffon.   So...yup, it suddenly became a labour of love instead of a quick throw-together top.


The drape is fantabulous.  

Directions are important.  After stitching the basting stitches, gathering the area where the seams will go and then adding the narrow elastic, I promptly stitched the seams right sides together.  Because that's how you normally sew a side seam.  BUT...that left the lovely drapey sleeves on the inside.  GAHHHH.

Since it was time for the party, and I had a billion-ty stitches to unpick on black bias cut chiffon, I decided to wear something else to the party and come back to this later.  Truthfully, my initial thought was "How much do I really want this top?" but when I came back to this later, I decided I really, really wanted it, so I tediously unpicked every stitch, and then stitched it the right way 'round.


The flutter sleeves turned out amazing.  Totally worth the unpicking in my opinion.  This is a pretty distinctive top, so I'm not sure I will make it again, at least for the foreseeable future, but I've made a pretty giant note to myself to make sure I don't sew it the wrong way round again.

Now all I need is a party to wear it to...

Thursday, January 25, 2018

Queen of Dots, a dotty SWAP

If you follow me on Instagram, you’ll have noticed a recent post of fabrics that I’ve pulled as a result of a stash toss (and maybe some recent purchases...ahem...).   In order to combat the winter blahs and the recent Blue Monday, I’m planning a late winter/early spring wardrobe for myself.  It’s definitely winter here right now, with cold temperatures and lots of snow/sleet/freezing rain. Usually, thoughts of spring have me dreaming of softer colours, like coral, turquoise and white, but for some reason I’m drawn to a dramatic wardrobe of red, mustard, black and grey.  Maybe I’m just not quite ready for spring yet? (Haha)

These are the fabrics I’ve pulled from my stash.  I love me my SWAP wardrobe (for the uninitiated, SWAP stands for Sewing With A Plan).  I spend hours dreaming about SWAPs, planning SWAPs,  sketching SWAPs, pulling fabrics for SWAPs from my stash, and buying fabric for SWAPs.

I typically plan around a SWAP core wardrobe, which I found in the Australian Stitches magazine series years ago (mid-90s /early 2000s maybe?)   I still have ALL of the original magazines that these articles were published in.  Each article added a few more clothing items to the author's wardrobe, which ended up being extremely wearable and very cohesive.  I travel a lot for both work and pleasure, and love that I can pack very quickly with a well planned wardrobe.


The core SWAP wardrobe I usually start with consists of:
  1. Jacket, typically in a simple style such as a cardigan jacket
  2. Pants #1
  3. Pants #2
  4. Skirt #1 in a solid colour
  5. Skirt #2 in a print or check
  6. Top #1
  7. Top #2
  8. Top #3
  9. Top #4
  10. Top #5
  11. Top #6
The tops are a mix of coordinating solids and prints, one of which should match Skirt #2 for a dress look.

And here are my plans for the my SWAP.  Ignore the numbers associated with the items in my sketches as  the plans have already been revised a few times.  A few of the sketched items are from my existing wardrobe as well, so you won't see them in my sewing plans, and some of them are also noted below as Extras.


The Queen of Dots, a dotty SWAP
  1. Jacket - short fitted collarless jacket in stone and black Prince of Wales stretch suiting
  2. Pants #1 - Closet Case Sasha Trousers in stone and black Prince of Wales stretch suiting
  3. Pants #2 - Christine Jonson Travel Trio One Centre Seam Pant in black ponte
  4. Skirt #1 - self drafted pencil skirt in stone and black Prince of Wales stretch suiting
  5. Skirt #2 - Christine Jonson Basewear Two skirt in black ponte
  6. Top #1 - My Image magazine #12 M1612, black crepe with white polka dots
  7. Top #2 - Butterick 5526 princess seam shirt, white crepe with black polka dots
  8. Top #3 - My Image ImageWear IW1002 blouse with bow at neckline in red crepe with black polka dots (see why it's called Queen of  Dots?!)
  9. Top #4 - Tilly & the Buttons Agnes Top with scoop neck and plain sleeves in red, black and tan leopard print brushed lightweight sweater knit
  10. Top #5 - My Image magazine #15 M1760 twist top in mustard heather jersey knit
  11. Top #6 - My Image magazine Fall/Winter 2013/2014 M1357  turtleneck sweater in white textured sweater knit

As is true for me when planning any SWAP, I have trouble limiting myself to only these items. That being said, I sew a lot with a high output of finished garments. #notbragging  #sorrynotsorry In fact, I make 99% of my own clothing.  I also own A LOT of fabric.  And I'm dotty to think I'll be able to focus long enough to get all these pieces finished before spring.  All that leads to my dream wardrobe to include the following items that I affectionately call "Extras".


  1. Vogue 7827, view B flutter sleeve top, black georgette with tiny polka dot
  2. Sew Over It Ella Blouse, red herringbone print crepe
  3. My Image blouse with gathers at centre front neckline, Red, beige and black print crepe 
  4. Sewaholic Renfrew top, view C with cowl, Black print lightweight sweater knit 
  5. My Image Spring/Summer 2015 M1504 shirt, short sleeves with draped neckline, ITY jersey in black, beige, red and cream print 
  6. Sew Over It Molly Top, ITY jersey in black, beige, red, blue and cream print 
  7. cowl neck top or wrap top, black lightweight rayon/lycra jersey 
  8. Helen’s Closet Blackwood Cardi, long version, red sweater knit 
  9. Muse Patterns, Jenna Cardigan with ruffle at the hems, black sweater knit 
  10. My Image magazine Fall/Winter drapey trousers, black brushed poly/rayon twill
  11. Angela Wolf Flared Trouser Jeans, beige stretch cotton twill 
  12. Boatneck tee with 3/4 length sleeves, black and white lycra jersey 

I'm not sure how likely it is that I'll get all of these done, but I already have the fabric pulled and the Extras flow really nicely with the pieces I've got planned for my Queen of Dots SWAP.  I can also adjust them for the spring/summer season by adjusting the length of the sleeves, hemlines and necklines.

Time to get sewing!!


Tuesday, September 27, 2016

FO - Simplicity 2728, NOLA SWAP The Big Easy

It would seem that a sewing retreat weekend can be super productive.  I finished five tank tops (not really worth a blog post since I've made a zillion of them and they're pretty straight forward), almost two Sew Over It Alex shirts (see my previous post here) and a jacket.  I love tailored jackets, and feel that every capsule wardrobe needs one.

For my NOLA The Big Easy SWAP, I chose a simple cardigan style jacket that is pretty modern in styling.  I used Simplicity 2728.  This is not a TNT pattern for me, but going with the theme of the weekend, I based decisions for pattern alterations on my historical standards (and even forgot some, which resulted in a design feature - see the details below).

Simplicity 2728 is out of print (OOP), but details can be found on Patternreview here.  


Pattern Description:  The description on the envelope is very plain, "Misses' Jacket with collar and sleeve variations."  As a Project Runway pattern, this pattern contains a lot of collar, sleeve and pocket variations, as well as front button placement options.  I chose to use the relatively "plain" version of the cardigan style front with three quarter length sleeves with fold-back cuffs, and pleated front rounded patch pockets.


Pattern Sizing: 4-22.  I chose size 12 based on the fact that was the largest size in the pattern grouping that I had.  I graded up at the waist and hip to about a size 16 (standard adjustment for me).  In retrospect, I would have preferred to use a size 14, but just didn't have that pattern available to me.

Did it look like the photo/drawing on the pattern envelope once you were done sewing with it? Yes, I think I did.  At least one of the many artist's versions depicted!

Were the instructions easy to follow? Yes, though I really didn't rely on them that much.

What did you particularly like or dislike about the pattern?  I love the variety of options.  This way once you get the basic jacket fit down, you can make up a number of jackets pretty quickly - and they won't all look like they're from the same pattern when you vary the design options!  Simplicity even includes a croquis template in their directions so that you can play designer very easily.

Pleated patch pocket with rounded corners

Fabric Used: Black and tan check wool boucle suiting from my stash.  I believe it is well aged, and I have no idea where I purchased it, though something says I bought it online.  The buttons also came from my stash, though the lining I bought last week on sale at my local Fabricland chain store.


Pattern alterations or any design changes you made:  Because I started with a size 12 (and typically would have started with a size 14), I increased the waist by adding to each of the seam allowances.  I also used a smaller seam allowance at the front vertical darts - this helped accommodate my bust cup size.  Next time, I will probably add a bit more to the shoulder width, as this one seems just a bit narrow for my taste.

I will also need to do a swayback adjustment next time on the pattern.  I'm not sure why I didn't do it on this one initially, as this is a standard adjustment for me.  Since I forgot to do it before I cut the jacket out, the first time I tried it on, I noticed quite a bit of fabric folding at the small of my back.  I decided to "save" the jacket by sewing a horizontal dart across this area from the side seam to the other side seam.  The pattern of the fabric, along with the boucle texture and the tab that I placed over it (which was planned even before this on-the-fly alteration) hide this alteration quite nicely, ifidosaysomyself.


I chose to do a fair bit of speed tailoring techniques with this jacket as well - using a few different weights of fusible interfacing to mimic hand tailoring.  After receiving my tailoring degree, I've really noticed how much I like to wear a decently tailored jacket, but didn't want to take the time to hand tailor a pattern I hadn't used before.  I interfaced the entire body with a very lightweight fusible interfacing, both the fronts and the backs.  I then used a heavier weight fusible interfacing over top of the lightweight interfacing on the seams at the neckline, centre fronts, and upper back area (instead of a back stay).  I also used a narrow cotton twill tape over the seam at the centre fronts and at the centre back to stabilize the seam.  I find it adds a crisp-ness to the edge of the garment that I really like.

I used a bias cut length of tailoring canvas for sleeve heads and I sewed narrow cotton twill tape over the seams around the armholes for support.

Lining pieces are also included with this pattern, which I really appreciate since I prefer my jackets to be lined - and often have to make my own lining pieces based on the jacket pattern.  The instructions are included for a bagged lining which, in conjunction with the speed tailoring techniques, makes for a pretty fast tailored jacket!


Would you sew it again? Would you recommend it to others?  Yes, I will sew this again.  I need a plain black jacket but want a cute (aka not boring) design.  As I mentioned above, you can change the design details such as the sleeve length, button placement, back tab, collar details and pocket styling to create a very different look without the hassle of fine tuning the fit again on another pattern.

Conclusion: A cute jacket pattern with lots of options.

Wednesday, September 21, 2016

FO - Sew Over It Alex Shirt

I suffer from insomnia.  Over the years, I have learned to deal with this by napping, sleep therapy, and medication.  But, sometimes there's nothing to do except get up out of bed, make a cup of tea, and read, sew, browse the internet or knit.

That's exactly what happened last week.  I woke up in the wee hours of the morning, made a cup of tea and opened up my emails where I found the e-mail announcement for the release for the Sew Over It City Break e-book.  OH MAN.  This fits my sewing philosophy to a Tee! (See what I did there?!)  I love Lisa Comfort's aesthetic and patterns, and this e-book is no exception. And with the fashion photographs for the e-book being taken in Paris, there was nothing to do but grab my credit card and make a middle of the night purchase.  I then been dreamed about sewing a wardrobe based on these patterns and travelling to Paris!

This past weekend, a sewing friend of mine and I planned a sewing retreat of sorts.  Basically, we got together at my house, just the two of us, with assorted sewing machines, patterns, sewing necessities and fabrics for an entire weekend of just sewing.  We only stopped long enough to eat pre-planned quick meals.  Well...maybe some wine and a margarita or two - but only as a celebration of finishing a long day of sewing!

Because I had just gotten the City Break e-book and was SUPER excited about it, I couldn't help but incorporate one or two items of clothing into my NOLA Big Easy Swap plan, replacing the originally planned shirt pattern.  I chose the Alex Shirt & Dress pattern, printed it out, taped the pages together, traced off the pattern and jumped right in.

Pattern Description: From the Sew Over It website:

Alex Shirt & Dress
Two-in-one, the Alex Shirt Dress is a versatile, classic pattern that will take anyone seamlessly from day to night. Although always loose and comfy, this pattern can look completely different depending on fabric choices. Made in linen, the shorter Alex Shirt is ideal for exploring the city in the daytime. But choose a lightweight crepe, viscose or georgette and you have a glamorous, knee-length evening shirt dress, perfect for that special restaurant.


Pattern Sizing:  UK 8-20.  I chose the size 14 comparing my body measurements to those written in the pattern.

Did it look like the photo/drawing on the pattern envelope once you were done sewing with it? Yes, I believe it does!


Were the instructions easy to follow?  Yes, very easy to follow.  I actually used them, thinking I would write a review.

What did you particularly like or dislike about the pattern?  The instructions are very well written, and Sew Over It offers a lot of support on their website.  They even have a tutorial for putting PDF patterns together here:  http://sewoverit.co.uk/assemble-a-pdf-pattern/

The patterns are included as separate files from the e-book, which I really liked as well - this makes it really easy to figure out which pages you need for the specific item of clothing.

One thing I had trouble with was the tabs for the sleeves.  I'm sure this is operator error.  Mine turned out pretty narrow and a bit bulky, and as a result I had a great deal of trouble putting buttonholes into them.  I think next time I may attach them to a piece of stabilizer using temporary adhesive spray before trying to make the buttonholes.

As much trouble as the tabs gave me, I really like the end result.  They offer a bit of versatility to the shirt, and give it a designer detail.

Fabric Used: I used a dark navy poly lightweight, almost sheer georgette with white polka dots.  I was hoping this would be a wearable muslin.


Pattern alterations or any design changes you made:  I chose the pattern size 14 by using the measurements included with the pattern directions.  I added 3" to the length of the sleeves, based on my arm measurements, but I ended up removing about 2" of this when it came to hemming.  I also ended up taking in about 1-1/2" off of the side seams below the underarm.  I think next time I may size down one or two sizes and do a full bust adjustment to keep it from being quite so voluminous.  But for a wearable muslin, it turned out just fine.


Would you sew it again? Would you recommend it to others?  I highly recommend this pattern and I did immediately sew it again out of a dark mustard yellow silk georgette with a raised floral pattern.  I just have to do the buttonholes and sew the buttons on, and then I'll write a post on it too.


Conclusion:  I can see this pattern as a TNT (tried 'n true) pattern in my wardrobe.  I am already searching through the stash to make it into the dress length!  I am also excited to try the other patterns in the e-book as they look like great basics too.  Lisa has really nailed it with the wear-ability of these patterns as a travel wardrobe.

I can see wearing this shirt with a pair of stretch jeans in mustard yellow with a chunky knit infinity scarf in cream or even a plaid blanket scarf for fall.

Tuesday, August 30, 2016

The Big Easy

Or, Fall SWAP 2016, Stage 1

I am a planner by nature and LOVE a capsule-style wardrobe. A capsule wardrobe work so easily for travel.  I travel a lot for both work and pleasure, and have realized that, at least for me for the majority of my trips, carry-on baggage is the best way to go.  I spend hours browsing, pinning (on Pinterest, that is), planning and coordinating fabrics and patterns for a wardrobe that will work together and make dressing in the morning relatively painless.  SWAP'ing (Sewing With A Plan) is a great way to do this, and the premise of it was made extremely popular by a series of articles by Lynn Cook in Australian Stitches magazine, and contests hosted by the now closed Timmel Fabrics a number of years ago.

I've gone away from SWAP'ping recently - with a focus on sewing whatever the mojo wants.  There are many reasons why this has happened, but I've ended up with quite a few orphan items in my closet, and have decided for Fall 2016 to get back to a focus.

My colour scheme for Fall 2016 is beige and black.  Which sounds ABSOLUTELY yawn-inducing-ly boring.  But, when you add in the planned pops of mustard yellow, teal, burgundy and rust orange it suddenly becomes much more exciting.  I've named it The Big Easy, because my goal is to have it done for my work trip to New Orleans for a conference at the end of September.  I have also chosen EASY patterns - this is key!

According to Lynn Cook, Stage one of the SWAP consists of the following 11 garments. 
  • 1 simple cardigan jacket in a solid colour
  • 2 pairs of pants
  • 2 skirts, one in a solid colour, one in a print or check
  • 2 simple tops, one solid, one in the above print
  • 4 tops, in colours which coordinate with the solids

Because I'm me, I'm venturing a bit outside of these guidelines.  They're guidelines, not written in stone.  

My jacket is not going to be out of a solid colour, but a very small check in a beige and black wool crepe
suiting.  I'm thinking of the Bolero Jacket, Multiples pattern with the three button front.

BOLERO JACKET

I already have two pairs of pants sewn from my travels this spring:

  • one a slim cut pair in black tropical  wool, 
  • the other a wide flow-y pair in beige wool crepe 

I have one skirt already that will fit into this plan, a black microfibre knit skirt that comes to just 
about the knee

  • I'm planning on a pencil skirt (my own draft) in the black/beige check to match the jacket.
My two simple tops will be Loes Hinse Tuscan Blouses:

  • the first a short-sleeve in a deep beige/rust colour
  • the second is with long sleeves and out of a black drapey textured polyester, not the suggested print.

LH Tuscan Blouse

The four tops will be where I bring the colour in.  The patterns I'm planning on for these are the Loes Hinse 
Tank Dress pattern, view D and the Loes Hinse Cap Sleeve Dress pattern, view C. I'm planning on:
  • one in a blood red/burgundy colour sweater knit 
  • one in a mustard yellow textured knit
  • one in a teal knit, and 
  • the last is an existing one in a microfibre black knit that is the same as one of the skirts in this plan.  

LH Cap Sleeve Dress

LH Tank Dress

Of course, I have a few extras that would be really nice to finish before my trip as well.  I love the ease and simplicity
of Dresses.  I'm hoping to add the Textile Studio Madison Avenue dress in a red & black textured knit, as well as a
Loes Hinse New York Dress, View A in a mustard yellow wool double knit to my wardrobe.  

LH New York Dress
Again, these are TNT patterns and simple and super quick to sew, but make a big impact.  

The last nice-to-have garment is a cardigan out of a sweater knit - probably in burgundy 
(depending on what I can find in my stash).

There you have it.  Stage 1, The Big Easy.  Now all I have to do is actually sew it.

Do you plan your sewing?  What do you do - do you have a method or a way you've found works for you?